
How to Clean Outside AC Unit: DIY Guidance for Homeowners
- Update Date: June 26, 2026
Disclosure: This post contains affiliate links. If you purchase through them, we may earn a small commission at no extra cost to you.

Share the Glint Editorial Team
We're a small team of home appliance researchers and writers focused on HVAC and appliance troubleshooting across North America. Our guides are created by analyzing manufacturer manuals, HVAC service documentation, and real-world repair patterns reported by technicians and homeowners. We use multiple independent sources to validate key technical claims, including manufacturer documentation and industry safety guidelines (such as EPA and DOE references where applicable). Our goal is to turn complex technical information into clear, practical guidance for everyday homeowners.
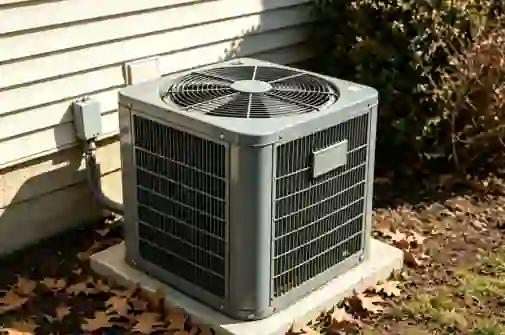
Quick Answer: Cleaning your outside AC unit means shutting off power, removing surface debris, rinsing the condenser coils from the inside out with a garden hose, and straightening any bent fins — the whole job takes 30–45 minutes once a year and costs next to nothing. A dirty outside unit is one of the most overlooked reasons an AC loses cooling power and drives up energy bills. This guide walks through how to clean outside AC unit coils and surrounding components safely, step by step, with no special equipment required for most homeowners.
Is this your exact situation?
A dirty outside AC unit causes problems that are easy to misread as refrigerant issues or compressor trouble — but often the fix is just a thorough cleaning. Here's what a neglected condenser unit typically looks like in action.
- The AC runs continuously but the house never gets as cool as it used to — the system is working hard but can't reject heat properly through clogged coils
- Your energy bill has climbed noticeably even though you're using the AC the same way as last year
- You can see visible debris — leaves, grass clippings, cottonwood fluff, or pet hair — matted against the outside of the unit's fins
- The outdoor unit feels extremely hot to be near, or the fan seems to be blowing noticeably warm air upward (warmer than usual)
- The system trips the high-pressure limit and shuts itself off on hot days, then restarts after cooling down for a while
- It's been more than a year since you last cleaned the outside AC unit — or you've never done it since moving in
Any one of these is a reasonable trigger to clean the unit. Two or more, and it's overdue.
What causes outside AC units to get dirty — ranked by how fast each clogs the system
All of these are normal and inevitable — the condenser unit sits outside year-round and pulls large volumes of air through its fins constantly. But some sources clog it much faster than others, and a couple are worth knowing about because they require a slightly different cleaning approach.
Estimated share: ~40%
Estimated share: ~25%
Estimated share: ~20%
Impact: restricts airflow, not just dirt
Estimated share: ~5% of units needing attention
How to Clean Outside AC Unit — the complete walkthrough
- 1Shut off power at the thermostat and the outdoor disconnectSet the thermostat to OFF. Then locate the outdoor disconnect box — it's usually mounted on the house wall within a few feet of the condenser unit. Open it and either flip the breaker, pull out the disconnect block, or remove the fuse cartridge depending on your model. Leave it off for the entire cleaning. This isn't optional. Working near an energized capacitor is genuinely dangerous.
- 2Clear the area around the unitRemove any objects stored near or leaning against the unit — garden tools, pots, furniture. Trim any vegetation that's grown within 18–24 inches of the unit on all sides, and pull any weeds growing up through the base. The condenser needs clear space to pull air in from the sides and exhaust it upward through the fan. Blocked airflow on even one side noticeably reduces efficiency.
- 3Remove loose debris from the top grille and finsPut on work gloves — the fin edges are surprisingly sharp. Use your hands or a soft brush to clear leaves, seed pods, cottonwood fluff, and debris off the top fan grille and from the outer fin surface. Don't push debris deeper into the fins; brush outward or lift it off the top. A soft paintbrush works well for dislodging dry debris from fin channels without bending them.
- 4Apply coil cleaner spray (optional but effective)If the fins look greasy, have a heavy dirt layer, or it's been more than a couple of years since the last cleaning, a no-rinse foaming coil cleaner spray does a noticeably better job than water alone. Products like Nu-Calgon Evap Foam or similar HVAC coil cleaners (available at HVAC supply stores or Amazon for $10–$18) are sprayed onto the fins, foam up as they lift grease and oxidation, and then rinse off. Let it sit 5–10 minutes before rinsing. For lighter maintenance cleaning, skip this and go straight to the hose.
- 5Rinse the coils — from the inside outThis is the key part of how to clean outside AC unit coils correctly. Use a garden hose with a spray nozzle set to a firm but gentle stream — not jet spray. Rinse from the inside of the unit outward through the fins. To do this, you either need to remove the top fan grille (usually 4 screws) and direct the hose down through the top, or angle the spray from the outside inward at a shallow angle if the grille design allows it. Rinsing inside-out pushes debris out the way it came in, rather than packing it deeper. Work your way around all four sides. The water coming out the bottom should run dirty, then clear.
- 6Let the unit dry completely before restartingGive it at least 30–60 minutes to air dry after rinsing, especially if you removed the top grille. Don't rush this. Once dry, replace the grille, restore power at the disconnect box, and set the thermostat back to cooling. The system should feel noticeably more efficient — better airflow from vents and a faster time to reach the set temperature are both signs the cleaning made a real difference.
- 7Straighten bent fins with a fin comb (if needed)While the unit is off and dry, inspect the fins around the perimeter. If you see sections where fins are crushed flat or pushed to one side, a fin comb ($8–$15 at any HVAC supply store or online) straightens them quickly. Match the comb's tooth spacing to your unit's fin density, slide it in, and pull upward gently. You don't need to get every fin perfect — just open up the crushed sections enough to allow airflow through. Even partial improvement helps heat transfer meaningfully.
- 8Know when to stop and call a proCall an HVAC technician if you notice any of these during cleaning: an oily or greasy residue on the coil fins (can indicate a refrigerant leak — refrigerant oil travels with the refrigerant and deposits on coil surfaces), ice or frost on the refrigerant lines even after the system has been off for a while, a burning smell when you restart the system, or the unit still underperforms after a thorough cleaning. These are equipment-level issues that cleaning won't fix. A certified HVAC tech can pressure-test for refrigerant leaks and inspect internal components you can't safely access.
DIY cleaning vs. pro service vs. unit replacement — the honest cost breakdown
Annual outside AC unit cleaning is one of the cheapest maintenance tasks you can do with one of the highest returns. But there are situations where DIY stops making sense — here's where each line falls.
| Task | DIY Cost | Pro Cost (parts + labor) | DIY Difficulty | Verdict |
|---|---|---|---|---|
| Annual outside AC unit cleaning (coils, fins, debris) | $0–$20 (coil cleaner spray optional) | $80–$160 (part of seasonal tune-up) | ✅ Easy | DIY — every time |
| Straighten bent condenser fins (fin comb) | $8–$15 (fin comb) | Included in most tune-up visits | ✅ Easy | DIY |
| Trim vegetation / clear unit surroundings | $0 | N/A — not an HVAC service | ✅ Easy | DIY — do this every season |
| Professional deep coil cleaning (chemical flush + internal rinse) | $15–$30 (coil cleaner + tools) | $120–$250 standalone service | ⚠️ Moderate — requires removing top grille | DIY if comfortable; pro recommended for heavily fouled or first-time cleaning |
| Refrigerant leak detection and repair | Not DIY — requires EPA 608 certification | $200–$1,500 depending on leak location and refrigerant type | 🔴 Requires license | Pro only — illegal to handle refrigerant without certification |
| Condenser fan motor replacement | $60–$150 (motor part only) | $300–$600 installed | 🔴 Requires electrical knowledge | Pro recommended — involves capacitor discharge risk |
| Full AC system replacement | Not DIY | $3,500–$7,500 installed (central AC, 2–3 ton) | 🔴 Licensed tech required | Pro only — consider if unit is 12+ years old and underperforming after cleaning |
| ⚠ When to stop DIYing | Stop and call an HVAC professional if: you find oily residue on the coil fins (refrigerant leak sign), the refrigerant lines are icing up after you restart, the fan blade wobbles or makes grinding noise, the unit trips the high-pressure limit repeatedly after cleaning, or performance doesn't improve at all after a thorough cleaning job. These are all equipment failures, not maintenance issues. | |||
📈 Repair vs. Replace — The 50% Rule for AC Units
A new central AC condenser unit typically costs $3,500–$7,500 installed (2026 average, 2–3 ton, 16–18 SEER2). Use this table to decide:
| Annual cleaning + minor maintenance Cost: $0–$50 | Any unit age | ✅ Always do it — no question |
| Refrigerant top-off or minor leak repair Cost: $150–$600 | Unit age <8 yrs | ✅ Repair — worth it on a younger unit |
| Fan motor or capacitor replacement Cost: $300–$700 | Unit age <10 yrs | ⚠️ Repair if unit is under 10 years old; evaluate if older |
| Compressor replacement Cost: $1,200–$2,500 | Unit age 8–12 yrs | ❌ Usually replace the unit — compressor cost approaches 50% of new unit price |
| Multiple component failures or unit using R-22 refrigerant Any cost | Unit 12+ yrs old | ❌ Replace — R-22 is phased out and extremely expensive; repair costs won't stop |
Energy Star recommends considering replacement if your AC is more than 10 years old and not keeping your home comfortable despite maintenance. See: energystar.gov — Central Air Conditioning
Sources & References
- 🔗 U.S. Department of Energy — Maintaining Your Air Conditioner (coil cleaning guidance, clearance requirements)
- 🔗 Energy Star — Central Air Conditioning (efficiency impact of maintenance, replacement guidance)
- 🔗 U.S. EPA — Section 608 Refrigerant Regulations (why refrigerant handling requires certification)
- 🔗 Air Conditioning Contractors of America (ACCA) — Quality Installation Standards (clearance and airflow requirements for outdoor units)
- 🔗 RepairClinic — Air Conditioner Repair Help (condenser fan motor, capacitor, and coil diagnostics)
Table of Contents
Toggle