
Thermostat Battery Replacement: Do It Before Your HVAC Stops Working
- Update Date: June 24, 2026
Disclosure: This post contains affiliate links. If you purchase through them, we may earn a small commission at no extra cost to you.

Share the Glint Editorial Team
We're a small team of home appliance researchers and writers focused on HVAC and appliance troubleshooting across North America. Our guides are created by analyzing manufacturer manuals, HVAC service documentation, and real-world repair patterns reported by technicians and homeowners. We use multiple independent sources to validate key technical claims, including manufacturer documentation and industry safety guidelines (such as EPA and DOE references where applicable). Our goal is to turn complex technical information into clear, practical guidance for everyday homeowners.
Quick Answer: Changing thermostat batteries takes under 5 minutes — pull the thermostat off its wall plate, swap in fresh AA or AAA alkaline batteries (check your model), and snap it back on. Most Honeywell thermostat battery replacements and standard digital thermostats use the same basic process; Nest thermostat battery replacement is slightly different since the Nest charges internally, but it's still a quick fix. This guide covers every common thermostat type, tells you exactly what the warning signs look like, and walks you through the replacement step by step.
Is This Your Exact Problem?
A dying thermostat battery doesn't always announce itself clearly. Sometimes the screen just goes blank. Other times your HVAC quietly stops responding and you don't figure out why until the house is 85°F. Here's what to look for — tick any that apply.
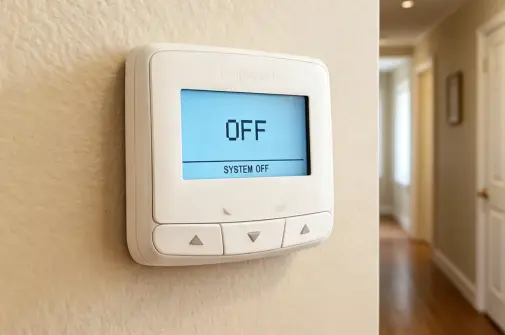
- The thermostat display is blank, dim, flickering, or shows a low-battery icon (often a small battery symbol or "LOW BATT" message)
- Your heating or cooling stopped running — but the thermostat screen still looks fine, which is confusing
- The thermostat isn't responding when you adjust the temperature or press buttons
- Your Honeywell or other programmable thermostat has lost its schedule and reset to factory default
- The system short-cycles — kicks on for a minute then shuts off — especially in cold weather when batteries drain faste
- You genuinely can't remember the last time you changed the batteries (more than a year = change them now)
Any one of these is a good reason to replace the batteries before you call an HVAC tech. It's free to check and takes 3 minutes.
What usually causes this — ranked by likelihood
Most of these are completely normal — batteries just age. But a couple of causes point to a bigger issue worth knowing about.
Estimated share: ~70% of low-battery situations
Estimated share: ~15% of premature failures
Estimated share: ~8% of cases
Estimated share: ~5% of Nest-specific complaints
Estimated share: ~2% of cases
Estimated share: ~1% of cases, mostly affecting smart thermostat models
Estimated share: <1% of cases
How to change thermostat batteries — the complete walkthrough
- 1Identify your thermostat model and battery typeBefore you buy anything, check what batteries your thermostat actually uses — they vary more than you'd think. Most Honeywell thermostat battery replacement jobs use two AA alkaline batteries; some older models use AAA or a 3V lithium coin cell (CR2032). Ecobee thermostats use AAA batteries. The battery type is printed inside the battery compartment door or in the model's manual on ManualsLib. And no — you can't just guess and hope the sizes match.
- 2Remove the thermostat from its wall plateMost modern thermostats — including the full Honeywell Home line — simply pull straight off the wall plate. Grip the body firmly with both hands and pull toward you; it should release with a gentle click or pop. Don't twist or pry from one side. Some older round thermostats (like the classic Honeywell T87) have a cover that snaps off first, then the battery compartment is inside. If yours has screws on the faceplate, use a small Phillips screwdriver to remove them.
- 3Open the battery compartment and remove old batteriesThe battery slot is usually on the back of the thermostat unit once it's off the wall. Slide the cover off or flip it open — most don't require tools. Remove the old batteries and look inside before you put new ones in. Any white powdery residue or blue-green crust means the batteries leaked. Go to Step 6 before continuing. No residue? Great — move straight to Step 4.
- 4Install fresh batteries — correct polarity mattersInsert new alkaline batteries following the +/− polarity markings molded into the battery compartment. Stick with name-brand batteries — Duracell or Energizer — and check the "best by" date. Don't mix old and new batteries. Don't use rechargeable NiMH batteries in most thermostats; their slightly lower voltage (1.2V vs. 1.5V) can cause erratic behavior or false low-battery warnings on some Honeywell models according to Resideo's support documentation.
- 5Reattach the thermostat and confirm it powers onClose the battery compartment, then press the thermostat body back onto the wall plate until it clicks into place. The display should light up within a few seconds. If it was showing a low-battery icon before, that should clear immediately. Check that your programmed schedule and temperature settings are still saved — most thermostats retain settings through a battery swap, but some older models reset to defaults. If yours reset, reprogram it from the front panel or the app.
- 6Clean corroded contacts if you found battery leakageDip a cotton swab in isopropyl alcohol (70% or higher) and gently scrub the metal contacts inside the battery compartment. The white powder is potassium carbonate from alkaline battery leakage — it's mildly irritating, so don't rub it in your eyes and wash your hands after. Let the compartment dry fully before installing new batteries. If the contacts are heavily corroded or the metal is pitted and black, the thermostat may not make reliable contact even after cleaning — at that point, replacement is the cleaner fix.
- 7Nest thermostat not charging? Check the C-wireIf you have a Nest and it keeps showing low battery despite being installed correctly, the issue is almost certainly a missing or loose C-wire (common wire) — the fifth wire in your HVAC wiring bundle that provides continuous 24V power to charge the Nest's internal battery. Open the Nest app → Settings → Equipment → check whether "C" shows as connected. Google's Nest support page walks through how to add a C-wire adapter or install the Nest Power Connector, which is a free solution for systems that lack a C-wire. See the link in Sources below.
DIY battery swap vs. professional visit vs. thermostat replacement — the cost breakdown
Most of the time this is a $5 fix. But there are a few scenarios where you'll spend more — and one where you genuinely should. Here's the honest breakdown.
| Fix | DIY Cost (parts) | Pro Cost (parts + labor) | DIY Difficulty | Verdict |
|---|---|---|---|---|
| Battery replacement (standard thermostat — AA/AAA) | $3–$8 | $75–$150 (service call fee) | ✅ Very Easy | DIY — always |
| Honeywell thermostat battery replacement (same process) | $3–$8 | $75–$150 | ✅ Very Easy | DIY |
| Clean corroded battery contacts | $0–$3 (isopropyl alcohol) | $75–$150 | ✅ Easy | DIY if corrosion is light |
| Nest C-wire adapter / Power Connector install | $0 (Nest provides adapter free) | $100–$200 | ⚠️ Moderate — involves low-voltage wiring | DIY if comfortable with wiring; otherwise hire a pro |
| Replace thermostat (basic programmable) | $20–$60 (e.g. Honeywell T6 Pro) | $120–$250 installed | ⚠️ Moderate | DIY if wiring is standard; consider pro for first-time install |
| Replace thermostat (smart — Nest, Ecobee) | $130–$250 (unit only) | $230–$400 installed | ⚠️ Moderate | DIY friendly; C-wire check required first |
| HVAC system not responding after new batteries — full diagnostic | Not DIY | $80–$200 (diagnostic + repair) | 🔴 Requires HVAC knowledge | Call a pro — problem is beyond the thermostat |
| ⚠ When to stop DIYing | Stop and call an HVAC tech if: you've replaced the batteries and the system still won't run, the thermostat display stays blank with fresh batteries in, you smell burning near the thermostat, or the HVAC breaker trips when the system tries to start. These point to wiring or equipment problems, not a battery issue. | |||
📈 Repair vs. Replace — Should You Fix or Upgrade Your Thermostat?
A new programmable thermostat runs $20–$60; a smart thermostat (Nest, Ecobee) runs $130–$250. Use this table to decide what to do:
| Battery replacement only Cost: $3–$8 | Any thermostat age | ✅ Always do it first |
| Battery replacement + contact cleaning Cost: $3–$10 | Thermostat age <7 yrs | ✅ Repair — easy win |
| Thermostat replacement (basic model) Cost: $20–$60 | Current unit 7+ yrs, no smart features | ⚠️ Consider upgrading — smart models pay back in energy savings |
| Smart thermostat upgrade (Nest / Ecobee) Cost: $130–$250 | Any situation | ✅ Often worth it — Energy Star certified models save ~8% on heating/cooling bills |
| Repeated battery failures + erratic behavior Any cost | Unit 8+ yrs old | ❌ Replace the thermostat — hardware is failing |
Energy Star certified smart thermostats are estimated to save homeowners about 8% on heating and cooling costs annually. See: energystar.gov — Smart Thermostats
Sources & References
- 🔗 Honeywell Home / Resideo — Thermostat Battery Replacement Guide (official support)
- 🔗 Google Nest Support — Nest Thermostat Battery & C-Wire Charging Issues
- 🔗 Energy Star — Smart Thermostats (energy savings data and certified models)
- 🔗 U.S. Department of Energy — Thermostats (maintenance and programming guidance)
- 🔗 ManualsLib — Honeywell Thermostat Manuals (battery type lookup by model)
- 🔗 RepairClinic — Thermostat Repair Help (symptom diagnosis and part lookup)
Table of Contents
Toggle