
How To Clean HVAC Vents: The Ultimate Step-by-Step Guide
- Update Date: June 18, 2026
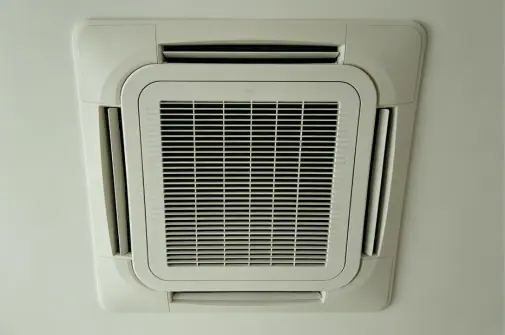
Disclosure: This post contains affiliate links. If you purchase through them, we may earn a small commission at no extra cost to you.

Share the Glint Editorial Team
We're a small team of home appliance researchers and writers focused on HVAC and appliance troubleshooting across North America. Our guides are created by analyzing manufacturer manuals, HVAC service documentation, and real-world repair patterns reported by technicians and homeowners. We use multiple independent sources to validate key technical claims, including manufacturer documentation and industry safety guidelines (such as EPA and DOE references where applicable). Our goal is to turn complex technical information into clear, practical guidance for everyday homeowners.
Quick Answer: Cleaning your HVAC vents means removing the vent covers, vacuuming the ducts as far as you can reach, wiping down the grilles, and replacing or cleaning your air filter — the whole job takes 30–45 minutes with basic tools. Dirty vents are one of the most overlooked causes of poor air quality and high energy bills in American homes. This guide walks you through every step, tells you what causes buildup in the first place, and shows you when to stop DIYing and call a pro.
Is This Your Exact Problem?
Dirty HVAC vents show up in a bunch of different ways — some obvious, some that you'd never connect to your vents at first. If a few of these sound familiar, you're in the right place.
- You can see visible dust, grey fuzz, or dark streaks around the vent grilles on your walls or ceiling
- There's a musty, stale, or "dusty" smell when the system kicks on — even if the house otherwise smells fine
- Some rooms feel noticeably warmer or cooler than others, and airflow from certain vents feels weak
- Your energy bills have been creeping up even though you haven't changed your thermostat habits
- People in your household are sneezing more, or allergy symptoms seem worse indoors than outside
- You haven't cleaned your HVAC vents in over a year — or honestly can't remember the last time you did
Any one of these is a good reason to clean your vents. If you're dealing with two or more, do it this weekend.
What usually causes this — ranked by likelihood
Most of these you can fix yourself. A couple require a pro. Here's what's actually happening inside your ducts, in order of how often we see it.
Estimated share: ~55% of dirty vent cases
Estimated share: ~25% of cases
Estimated share: ~10% of significant blockage cases
Estimated share: ~5% of cases
Estimated share: ~3% of cases
Estimated share: ~2% of cases
Estimated share: <1% of cases
How to clean your HVAC vents — the complete walkthrough
- 1Turn off your HVAC system and gather suppliesSet your thermostat to OFF — not just “fan auto.” You want the blower completely stopped so you’re not breathing in a cloud of dislodged dust. Grab your vacuum, a few microfiber cloths, a screwdriver, and a bucket of warm water with a drop of dish soap. Lay down an old towel or drop cloth under the first vent you’re working on.
- 2Remove each vent cover (grille)Most vent grilles are held by two screws — one at each end. Some snap out without any screws at all, especially in newer construction. Unscrew counterclockwise and set the screws somewhere you won’t lose them (a small bowl works great). Ceiling vents can be heavier than they look — catch them with both hands. And be careful on a ladder.
- 3Wash the vent coversTake your vent grilles to the sink or outside. Wash them with warm soapy water and a soft brush or old toothbrush — get into all the slats. Rinse thoroughly. This is probably the most satisfying part of the whole job. Let them air dry completely before reinstalling, or wipe them dry with a clean cloth. Putting a wet grille back on a duct creates the humidity that leads to mold.
- 4Vacuum inside the duct openingWhile the grille is off, shine a flashlight into the duct and vacuum out as far as your hose extension can reach — typically 12–18 inches. Use the brush attachment to loosen dust from the duct walls before sucking it up. Focus especially on the edges and corners where the duct meets the floor or wall. You're not cleaning the whole duct system here — just clearing the accessible section near the vent opening.
- 5Check and replace your air filterYou can clean HVAC vents perfectly and undo the whole thing in a week if you put a clogged filter back in. Pull out your current filter and hold it up to a light source. If you can't see light through it, replace it. Most 1-inch standard filters should be replaced every 1–3 months according to the U.S. Department of Energy. If you have pets or someone in the house with allergies, aim for every 30–45 days. Note your filter size (printed on the frame) and pick up a replacement while you're at the store — MERV 8–11 is the sweet spot for most homes.
- 6Reinstall vent covers and do a test runOnce all your vent grilles are dry, screw them back in snugly — not over-tightened. Turn your thermostat back on and set it to call for heating or cooling. Stand near a few vents and feel for strong, even airflow. If certain vents still feel weak after cleaning, the issue may be deeper in the ductwork and worth flagging to an HVAC tech on your next service visit.
- 7Know when to stop and call a professionalCall an HVAC professional if you: see black or greenish growth inside the ducts (possible mold), notice rodent droppings or nesting material, find that multiple vents have severely reduced airflow even after cleaning, or smell burning when the system runs. These aren't DIY situations. A certified NADCA air duct cleaning professional has the equipment to do a full duct inspection and cleaning safely. The EPA also has guidance on mold in HVAC systems at epa.gov/mold.
DIY vent cleaning vs. pro services vs. full replacement — the cost breakdown
Here's the honest picture on what things cost. Most of the time, learning how to clean HVAC vents yourself saves you real money — but there are a few situations where calling in a pro is just the smarter call.
| Fix | DIY Cost (parts) | Pro Cost (parts + labor) | DIY Difficulty | Verdict |
|---|---|---|---|---|
| Clean vent grilles + vacuum duct openings | $0–$5 (soap, cloths) | $80–$150/visit | ✅ Easy | DIY — every time |
| Replace 1-inch standard air filter (MERV 8–11) | $8–$25 | $30–$60 (filter + labor) | ✅ Easy | DIY |
| Replace 4–5 inch media filter or whole-home filter | $25–$60 | $80–$130 | ⚠️ Moderate | DIY if you can reach it safely |
| Professional duct cleaning (whole-home system) | Not DIY | $300–$700 (average home) | 🔧 Requires equipment | Pro — every 3–5 years per NADCA |
| Mold remediation inside ductwork | Not recommended DIY | $700–$2,000+ | ☣️ Health risk | Pro only — do not DIY |
| Duct sealing / repair of leaky joints | $30–$80 (mastic sealant or foil tape) | $300–$1,000 | ⚠️ Moderate (accessible ducts only) | DIY for accessible ducts; pro for in-wall/attic runs |
| Full HVAC system replacement (10+ yr old unit) | Not DIY | $5,000–$12,000 installed | 🔴 Licensed tech required | Pro only — consider if unit is 10–15+ years old and failing |
| ⚠ When to stop DIYing | Stop and call a pro if you: see visible mold growth inside the ducts, find rodent droppings or hear sounds in the walls, notice a burning smell when the system runs, or have multiple rooms with zero airflow after cleaning vents and changing the filter. | |||
📈 Repair vs. Replace — The 50% Rule
A new central HVAC system typically costs $5,000–$12,000 installed (2026 average, depending on size and efficiency rating). Use this table to decide:
|
Filter replacement + vent cleaning Cost: $0–$60 | ✅ Always do it — no question |
|
Professional duct cleaning Cost: $300–$700 | Unit age <10 yrs | ✅ Repair — good investment |
|
Mold remediation + duct sealing Cost: $1,000–$2,500 | Unit age <8 yrs | ⚠️ Depends on unit age and condition |
|
Major component repair (compressor, coil) Cost: $1,500–$3,500 | Unit age 10+ yrs | ❌ Likely replace the unit |
|
Multiple failures in one season Any cost | Unit 12+ yrs old, uses R-22 refrigerant | ❌ Replace the unit — R-22 is phased out |
Energy Star recommends having HVAC equipment evaluated by a professional if it's more than 10 years old and not keeping your house comfortable. See: energystar.gov — HVAC Product Criteria & Guidance
Sources & References
- 🔗 U.S. Department of Energy — Maintaining Your Air Conditioner (air filter guidance)
- 🔗 U.S. EPA — Should You Have the Air Ducts in Your Home Cleaned? (mold & duct cleaning guidance)
- 🔗 NADCA (National Air Duct Cleaners Association) — When to Have Air Ducts Cleaned
- 🔗 Energy Star — Heating & Cooling Efficiency Guidance (when to replace aging HVAC equipment)
- 🔗 U.S. Department of Energy — Duct Sealing (duct leakage and energy loss statistics)
- 🔗 U.S. EPA — Mold Course Chapter 2: Why and Where Mold Grows (HVAC & humidity)
Table of Contents
Toggle