
Refrigerator Leaking Water on Floor? How to Find Where It's Coming From and Fix It Yourself
- Update Date: July 23, 2026
Disclosure: This post contains affiliate links. If you purchase through them, we may earn a small commission at no extra cost to you.

Share the Glint Editorial Team
We're a small team of home appliance researchers and writers focused on HVAC and appliance troubleshooting across North America. Our guides are created by analyzing manufacturer manuals, HVAC service documentation, and real-world repair patterns reported by technicians and homeowners. We use multiple independent sources to validate key technical claims, including manufacturer documentation and industry safety guidelines (such as EPA and DOE references where applicable). Our goal is to turn complex technical information into clear, practical guidance for everyday homeowners.
Quick Answer: A refrigerator leaking water on floor is most often caused by a clogged defrost drain, a cracked or disconnected water supply line, or an overflowing drain pan underneath the unit — and all three are fixable at home in 20–45 minutes with basic tools. The first thing to do is figure out where the water is actually coming from: back of the unit, underneath, or from inside the fridge dripping down to the floor. This guide walks through each cause in order of how often it happens, with specific checks and fixes for each.
Is this your exact problem?
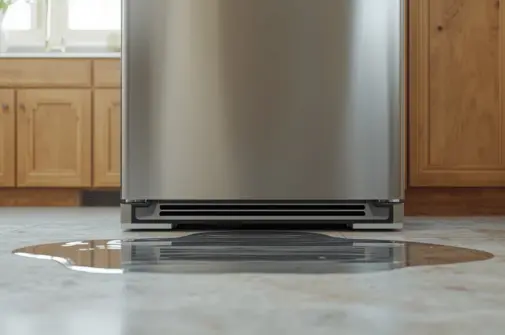
Before you start chasing the leak, it helps to narrow down where the water is actually coming from — because the source tells you the cause. A refrigerator leaking water on floor from the back is a totally different problem from one that's pooling water underneath or dripping from inside the fresh food section. Check which of these matches your situation.
- There's a puddle of water on the floor under or directly in front of the refrigerator — you noticed it after opening the door or by stepping in it
- Water seems to be coming from the back of the unit — near the water supply line connection or the drain pan area
- There's water pooling inside the refrigerator at the bottom of the fresh food section, which then drips onto the floor when the door opens
- Your refrigerator leaks water on the floor specifically after the defrost cycle runs — typically every 8–12 hours, so you notice new water periodically rather than a constant drip
- The leak only happens when you use the ice maker or water dispenser, or shortly after
- The fridge has been recently moved, had a new water line connected, or the doors were reattached — and the leak started shortly after
Where the water appears is the fastest clue to what's causing it. The steps below are organized by source location so you can go straight to the right fix.
What causes the refrigerator leaking water on floor — ranked by how common each is
Most refrigerator water leaks come down to four or five real causes. Here they are in order of frequency, with a quick confirmation test for each so you can identify yours before touching a single screw.
Frost-free refrigerators automatically melt frost off the evaporator coils every 8–12 hours. That meltwater is supposed to drain through a tube at the back of the freezer section, down to a drain pan under the unit where it evaporates. When that drain tube gets clogged — with food debris, mineral deposits, or a plug of ice — the water has nowhere to go and backs up into the bottom of the refrigerator compartment, then drips down and onto the floor. This is the single most common reason a refrigerator leaks water on the floor, according to RepairClinic's appliance repair data.
The timing is the giveaway: water appears periodically (after each defrost cycle) rather than in a constant stream. You'll often find standing water inside the bottom of the refrigerator section too.
Refrigerators with ice makers or water dispensers have a supply line — usually ¼-inch plastic tubing or braided stainless — connecting to the household water supply. This line runs along the back of the unit and connects at a fitting behind the refrigerator. A cracked line, a loose compression fitting, or a kink that eventually caused a split will drip or spray water continuously whenever water pressure is present. Moving the refrigerator even slightly can stress an aging plastic line enough to crack it.
This is the most likely cause when the refrigerator leaking water on floor specifically from the back of the unit.
The drain pan (also called the drip pan or evaporation pan) sits underneath the refrigerator and collects defrost water, which normally evaporates from the warmth of the compressor and the ambient air. In very humid conditions, or if the defrost system is producing more water than the pan can handle, the pan can overflow and cause the refrigerator to leak water on the floor underneath the unit. A cracked pan has the same result — water drips out regardless of volume. This is easy to check and the pan itself costs $10–$30 to replace.
The water inlet valve is a solenoid-controlled valve at the back of the refrigerator that opens briefly to fill the ice maker tray. When this valve fails — either the solenoid sticks partially open or the valve body cracks — it drips a slow, continuous trickle of water that runs down the back of the unit and pools on the floor. You'll typically find water at the back lower corner of the refrigerator, and the leak may be worse right after the ice maker cycles.
A door gasket that's cracked, compressed flat, or no longer sealing properly allows warm, humid room air to enter the refrigerator continuously. That warm air hits the cold interior surfaces and condenses into water — more than the normal evaporation system can handle. The excess moisture eventually drips down and finds its way to the floor. This tends to look like water appearing around the front base of the refrigerator rather than from the back, and it's often worse in summer when indoor humidity is high. But it's an easy and inexpensive fix if caught early.
How to find the real cause — step by step
- 1Locate where the water is actually coming fromDry the floor completely and place paper towels in a few spots: one under the front, one at each back corner. Run the refrigerator for an hour (or wait for the next defrost cycle), then check which towels are wet. Water at the front bottom = likely drain pan, clogged defrost drain, or door gasket. Water at the back = supply line, inlet valve, or drain pan overflow running to the rear. This one step saves you from chasing the wrong cause and taking apart the wrong part of the fridge. Take two minutes. Do it.
- 2Check and clear the defrost drain tubeThe defrost drain is at the back of the freezer floor, usually behind a small panel or under the bottom drawer. Remove any food and the freezer floor panel (typically 2–4 screws). Locate the drain hole — it's a small opening at the lowest point. If you see ice plugging it, that's your culprit. Use a turkey baster filled with warm water to flush the drain repeatedly until it runs freely. For stubborn clogs, a flexible pipe cleaner pushed gently down the drain tube breaks up debris. PartSelect recommends running hot water (not boiling) to avoid cracking plastic components. Once clear, pour a cup of warm water down the drain and confirm it flows to the pan underneath.
- 3Inspect and empty the drain panRemove the front toe grille — it usually snaps off or has two screws. Slide out the drain pan carefully (it may be full). Inspect it for cracks, holes, or mold buildup. A full but intact pan usually means the defrost drain was clogged and is now resolved. A cracked pan needs replacing — search your model number on PartSelect to find the exact part ($10–$30 for most models). Clean the pan with warm soapy water, dry it, and slide it back before reinstalling the grille.
- 4Inspect the water supply line and inlet valveUnplug the refrigerator and shut off the water supply. Pull the unit carefully away from the wall — have towels ready. Inspect the full length of the ¼-inch supply line from the wall valve to the back of the fridge. Run a dry paper towel slowly along it to catch any moisture. Check the compression fittings at both ends — a loose fitting is the most common source of refrigerator leaking water on the floor from the back. Tighten any loose fittings with a wrench (hand-tight plus a quarter turn). If the line itself is cracked or brittle, replace it entirely — new supply line kits cost $10–$20 at any hardware store and are a 15-minute swap. While you're back there, check the inlet valve for drips or mineral buildup.
- 5Test and replace the door gasket if neededClose the door on a dollar bill at several points around the perimeter — top, sides, and bottom. If it slides out without resistance anywhere, the gasket is failing in that section. First try cleaning the gasket thoroughly with warm soapy water and a soft cloth — a dirty or stiff gasket often just needs to be cleaned and worked back into its channel. If it's cracked, torn, or permanently compressed, order a replacement gasket for your model number from PartSelect or ManualsLib (search your model for the correct part number). Gaskets on most models peel out of a channel and press back in without tools — 15 minutes start to finish.
- 6Still leaking after all of the above? Here's where to stopIf the drain is clear, the drain pan is intact, the supply line and inlet valve are dry, and the gaskets seal properly — but the refrigerator is still leaking water on the floor — the source is likely an internal water line crack inside the refrigerator cabinet walls, a failed ice maker fill tube, or a cracked ice maker assembly. These require partial disassembly of the refrigerator interior. At this point it's worth calling a licensed appliance technician; they can identify internal water paths that aren't visible from outside. Tell them exactly what you've already ruled out — it shortens the diagnostic visit significantly.
DIY repair vs. pro service vs. replacement — the honest cost breakdown
Most freezer-works-but-refrigerator-not-cooling situations are fixable for under $100 in parts. A few require a pro. And one scenario — an old fridge with a failed sealed system — is where replacement genuinely makes more sense than repair.
| Fix / Scenario | DIY Cost | Pro Cost (parts + labor) | DIY Level | Verdict |
|---|---|---|---|---|
| Clear clogged defrost drain (turkey baster + warm water) | $0 | $100–$200 service call | 🟢 Very Easy | DIY — always try this first |
| Replace cracked or overflowing drain pan | $10–$30 (part) | $100–$200 installed | 🟢 Easy — snap out, snap in | DIY |
| Replace ¼-inch water supply line | $10–$20 (line kit) | $100–$200 installed | 🟢 Easy — compression fittings, no soldering | DIY |
| Tighten loose supply line fitting | $0 | $100–$150 service call if overlooked | 🟢 Very Easy | DIY — check this before anything else on back-of-unit leaks |
| Replace door gasket | $20–$60 (model-specific part) | $100–$220 installed | 🟢 Easy — press-in channel, no tools | DIY |
| Replace water inlet valve | $20–$60 (part) | $150–$300 installed | 🟡 Moderate — requires pulling fridge out and disconnecting wiring | DIY if comfortable; pro for first-timers |
| Internal water line crack / ice maker assembly replacement | $25–$100 (parts vary) | $200–$450 installed | 🔴 Requires interior disassembly | Pro recommended — leak source inside walls is hard to trace without experience |
| ⚠ When to stop DIYing | Stop and call a licensed appliance technician if: you've cleared the drain, replaced the supply line, and checked the drain pan but the refrigerator still leaks water on the floor; the water source is inside the refrigerator walls or behind the liner; the ice maker assembly is cracked; or your unit is under manufacturer warranty (DIY repair can void it). Always unplug before any access to internal components. | |||
📈 Repair vs. Replace — Is This Refrigerator Worth Fixing?
A new mid-range refrigerator runs $800–$1,800 (French door / side-by-side, 2026). Energy Star certified models save $100–$200 per year vs. older inefficient units. Here's the decision framework:
|
Defrost drain flush, drain pan, supply line, or gasket Cost: $0–$60 DIY | Any fridge age | ✅ Repair — always worth it, very low cost |
|
Water inlet valve replacement Cost: $20–$60 DIY / $150–$300 pro | Fridge age <8 yrs | ✅ Repair — well under 50% of replacement cost |
|
Internal water line or ice maker assembly repair Cost: $200–$450 pro | Fridge age <7 yrs | ⚠️ Repair if under 7 years old; evaluate if older |
|
Multiple failures (leak + cooling problem + compressor noise) Combined repair cost $400+ | Fridge age 8–10+ yrs | ❌ Replace — combined repair approaches 50%+ of new unit cost; invest in an Energy Star model instead |
|
Any repair on a refrigerator 12+ years old Any cost | ❌ Strongly consider replacing — average fridge lifespan is 12–15 years; a new Energy Star unit saves significantly on energy over the next decade |
Energy Star certified refrigerators use at least 15% less energy than the federal minimum standard. See: energystar.gov — Refrigerators
Sources & References
- 🔗 RepairClinic — Refrigerator Repair Help (clogged defrost drain as leading cause of refrigerator leaking water on floor; inlet valve and drain pan diagnosis)
- 🔗 PartSelect — Refrigerator Leaking Repair Help (defrost drain, supply line, and door gasket part lookup and repair guides)
- 🔗 U.S. Department of Energy — Refrigerators (maintenance guidance including condenser coil and drain care)
- 🔗 Energy Star — Refrigerators (efficiency data, replacement cost justification, certified model guidance)
- 🔗 ManualsLib — Refrigerator Manuals (drain pan location, gasket part numbers, and disassembly diagrams by model)
- 🔗 U.S. CPSC — Water Damage Prevention (appliance water leaks as a leading source of kitchen flood damage)
Q1: Why is my refrigerator leaking water on the floor?
The most common reasons a refrigerator is leaking water on the floor are a clogged defrost drain, a damaged water supply line, an overflowing drain pan, or a faulty ice maker water inlet valve. Start by identifying where the water appears — front, underneath, or behind the refrigerator — because the location usually reveals the cause.
Q2: What should I do first when my refrigerator leaks water on the floor?
First, unplug the refrigerator and stop the water supply if your unit has an ice maker or water dispenser. Dry the floor, place towels around the refrigerator, and determine whether the leak comes from the front, bottom, inside compartment, or back of the appliance. This prevents unnecessary repairs and reduces water damage risk.
Q3: Why is my refrigerator leaking water from the bottom?
A refrigerator leaking water from the bottom is commonly caused by a clogged defrost drain, cracked drain pan, or excessive water buildup underneath the appliance. Check the drain pan under the refrigerator first, then inspect the defrost drain for ice or debris blocking water flow.
Q4: Why is my refrigerator leaking water on the floor from the back?
If water is leaking from the back of your refrigerator, the most likely causes are a loose water supply connection, cracked water line, or failing water inlet valve. Refrigerators with ice makers and water dispensers are especially likely to develop leaks from these components.
Q5: How do I fix a refrigerator leaking water on the floor?
To fix a refrigerator leaking water on the floor, check the defrost drain, inspect the drain pan, examine the water supply line, and test the ice maker inlet valve. Many common leaks can be repaired in 20–45 minutes with basic tools if the problem is a clogged drain or loose connection.
Q6: Is a clogged defrost drain the most common reason a refrigerator leaks water?
Yes. A clogged defrost drain is one of the most common causes of refrigerator water leaks. During normal operation, melted frost drains into a pan underneath the refrigerator. When the drain becomes blocked by ice, food debris, or mineral buildup, water backs up and leaks onto the floor.
Q7: How do I unclog a refrigerator defrost drain?
To unclog a refrigerator defrost drain, remove the freezer panel if needed, locate the drain opening, and flush it with warm water using a turkey baster or small funnel. For stubborn clogs, gently use a flexible brush or pipe cleaner until water flows freely into the drain pan.
Q8: Why does my refrigerator leak water only after the defrost cycle?
A refrigerator that leaks water after the defrost cycle usually has a clogged or restricted defrost drain. Frost melts every 8–12 hours, and if the drainage path is blocked, the melted water overflows and eventually reaches the floor.
Q9: Why is my fridge leaking water but still cooling?
A refrigerator can continue cooling normally while leaking water because many leaks involve the drainage system, water line, or ice maker components rather than the cooling system. A clogged defrost drain is a common example where cooling remains normal but water escapes.
Q10: How much does it cost to fix a refrigerator leaking water on the floor?
Most refrigerator water leaks cost less than $30 for DIY repairs. Common fixes include clearing a defrost drain, replacing a drain pan, or installing a new water supply line. Professional appliance repair typically costs more depending on parts and labor.
Q11: Can I fix a refrigerator water leak myself?
Yes, many refrigerator leaks can be fixed yourself. Simple repairs include clearing a clogged drain, tightening water line fittings, replacing a drain pan, or installing a new door gasket. However, internal water line cracks and ice maker failures usually require a professional appliance technician.
Q12: Why is water pooling inside my refrigerator and leaking onto the floor?
Water pooling inside the refrigerator usually means the defrost drain is blocked or the drainage system cannot remove melted water properly. The water collects at the bottom of the fresh food compartment before dripping onto the floor.
Q13: Why does my refrigerator leak only when I use the ice maker?
If the leak happens only when using the ice maker, inspect the water supply line, inlet valve, and ice maker fill tube. A damaged inlet valve can drip after the ice maker fills and create water around the back bottom area of the refrigerator.
Q14: How do I know if my refrigerator water line is leaking?
A leaking refrigerator water line usually causes water near the back of the appliance. Pull the refrigerator away from the wall, inspect the tubing and connections, and run a dry paper towel along the line to find moisture or dripping points.
Q15: Why is my refrigerator drain pan overflowing?
A refrigerator drain pan can overflow when too much defrost water enters the pan, when the defrost drain is blocked, or when the pan is damaged. A cracked drain pan can also leak even when the amount of water is normal.
Q16: How often should I clean my refrigerator defrost drain?
Cleaning the defrost drain once a year is recommended as preventive maintenance. Regular flushing helps prevent food debris and mineral buildup from blocking the drain and causing future refrigerator leaks.
Q17: Can a bad refrigerator door gasket cause water leaks?
Yes. A damaged refrigerator door gasket allows warm air to enter, causing excess condensation inside the refrigerator. Over time, this moisture can create water buildup that eventually leaks onto the floor.
Q18: When should I call a professional refrigerator repair technician?
Call a professional appliance technician if the drain is clear, the water line is intact, the drain pan is not damaged, and the refrigerator still leaks. Internal water leaks, damaged ice maker assemblies, or hidden tubing problems usually require specialized diagnosis.
Q19: Is a refrigerator leaking water dangerous?
Yes. A refrigerator leaking water on the floor can create slip hazards, damage hardwood or vinyl flooring, encourage mold growth, and damage appliance components if ignored. Fixing the leak early prevents larger repair costs.
Q20: Why does my refrigerator leak after it was moved?
A refrigerator may leak after being moved because the water supply line can become loose, kinked, or cracked from movement. Check all connections behind the refrigerator before replacing parts.
Q21: How long does it take to fix a refrigerator leaking water?
Most common refrigerator water leaks can be diagnosed and repaired within 20–45 minutes. More complicated problems, such as internal tubing damage or ice maker replacement, may require professional service.
Q22: Should I repair or replace a refrigerator that keeps leaking water?
Repair is usually worthwhile when the problem is a drain clog, water line, drain pan, or gasket because these repairs are inexpensive. Replacement may make more sense for older refrigerators with multiple failures or expensive repairs.
Q23: What tools do I need to fix a refrigerator water leak?
Common tools include screwdrivers, towels, a turkey baster, flexible brush or pipe cleaner, and pliers for water line fittings. These tools are enough for many basic refrigerator leak repairs.
Q24: How can I prevent my refrigerator from leaking water again?
Prevent refrigerator leaks by cleaning the defrost drain yearly, checking water connections, keeping the refrigerator level, and inspecting door seals regularly. Preventive maintenance reduces clogged drains and water damage problems.
Q25: Do I need refrigerator repair service near me for a leaking fridge?
If DIY troubleshooting does not solve the problem, contacting a local refrigerator repair technician is recommended. A qualified appliance repair professional can diagnose hidden leaks, replace failed components, and prevent further kitchen water damage.
Table of Contents
Toggle